I recently set up a CI/CD pipeline to deploy the Parka Software website using GitHub Actions. Now whenever I push changes to the main branch, the site automatically builds and deploys to our IIS server. This post walks through how I configured the workflow and what you need to get it working for your own .NET projects on a self-hosted Windows server.
This post is about the build server being the same as the hosting server. You can have a separate build server if you want - this is most common in production and/or enterprise environments.
Prerequisites
Before getting started, you'll need:
- A Windows server running IIS with your site already configured
- Admin access to the server to install the GitHub Actions runner
- A GitHub repository with your .NET project
- .Net SDK installed on build/host server
Step 1: Add a New GitHub Action
First, create the workflow file in your repository. Add a new file at .github/workflows/deploy.yml. This is an example and the base file that I use to build off of:
name: Deploy to IIS

on:
  push:
    branches:
      - main

jobs:
  build-and-deploy:
    runs-on: self-hosted

    steps:
      - name: Checkout code
        uses: actions/checkout@v4

      - name: Setup .NET
        uses: actions/setup-dotnet@v4
        with:
          dotnet-version: '8.0.x'

      - name: Restore dependencies
        run: dotnet restore

      - name: Build
        run: dotnet build --configuration Release --no-restore

      - name: Publish
        run: dotnet publish -c Release -o ./publish --no-build

      - name: Stop IIS Site
        run: |
          Import-Module WebAdministration
          Stop-WebSite -Name "YourSiteName"
        shell: powershell

      - name: Deploy files
        run: |
          $source = "./publish/*"
          $destination = "C:\inetpub\wwwroot\yoursite"
          Copy-Item -Path $source -Destination $destination -Recurse -Force -Exclude "appsettings*.json"
        shell: powershell

      - name: Start IIS Site
        run: |
          Import-Module WebAdministration
          Start-WebSite -Name "YourSiteName"
        shell: powershell
Replace YourSiteName with your IIS site name and update the destination path to match your site's location on the server.
Step 2: Set Up a Self-Hosted Runner on Your Windows Server
Since we're deploying to a self-hosted IIS server, we need to install a GitHub Actions runner on that server. This lets the workflow run directly on the machine where your site lives.
- In your GitHub repository, go to Settings > Actions > Runners
- Click New runner > New self-hosted runner
- Choose Windows as the operating system
Download the Runner
You'll see three code windows of commands to run from the GitHub page. The first section of commands downloads the runner to your server. It will look similiar to this:
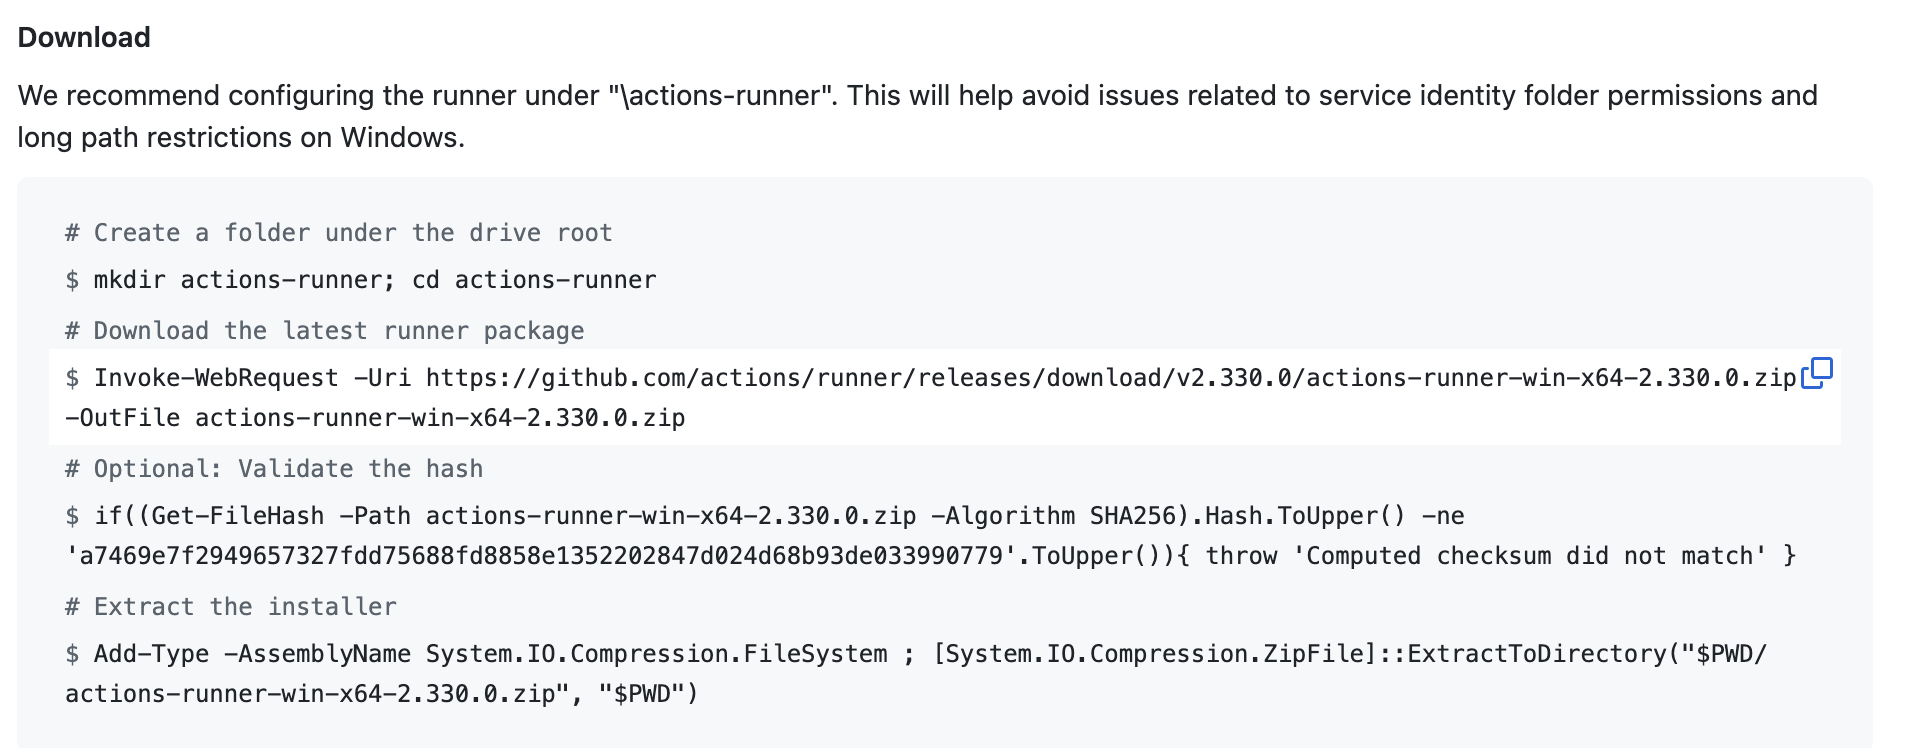
Open PowerShell on your server and run the download commands from GitHub. You might run into this error:
Invoke-WebRequest : The request was aborted: Could not create SSL/TLS secure channel.GitHub requires TLS 1.2+, which isn't the default on older versions of PowerShell. To fix this, run the following command before the download:
[Net.ServicePointManager]::SecurityProtocol = [Net.SecurityProtocolType]::Tls12This only applies to your current session. To make it permanent, you can add this to your PowerShell profile.
Configure the Runner
Once the actions-runner download is complete, open Command Prompt (not PowerShell) and run the Configure commands from there. I've found that running the config command in PowerShell sometimes causes it to hang. I haven't dug into this too deeply yet, but there's a GitHub issue about it.
Go through the configuration wizard. Accept the detauls unless you have a specific need to change any of them. For the network user I created a specific GitHub runner user account on the server that has the necessary file and folder rights.
Run as a Service
At the end of the installation wizard select Y to create the service so it will run automatically.
Step 3: Handle appsettings.json
You probably don't want to overwrite your production appsettings.json every time you deploy. In the workflow above, I exclude appsettings files during the copy step:
Copy-Item -Path $source -Destination $destination -Recurse -Force -Exclude "appsettings*.json"This means you'll need to manage production settings manually on the server, but it prevents accidentally pushing development configuration to production.
Troubleshooting
Runner not picking up jobs? Make sure the runner service is running and check the runner logs in the _diag folder.
Permission denied when copying files? The account running the GitHub Actions service needs write access to your IIS site folder.
IIS site won't stop/start? The service account needs permission to manage IIS. You may need to run the runner service as an administrator or a user with IIS management rights.
Conclusion
Setting up GitHub Actions for IIS deployment takes a bit of initial configuration, but once it's working you'll never want to go back to manual deployments. Every push to main automatically builds and deploys your changes. No more copying files over RDP or forgetting to restart the app pool.
If you run into issues with credentials or permissions, double-check that your service account has the necessary rights to stop/start IIS sites and write to the deployment folder.